Showing posts with label stenciling. Show all posts

Tuesday, August 17, 2010

Argyle Stenciled Bodysuit


A little while back I bought a bunch of plain white bodysuits for my little guy. It's taken a long time to decide what I wanted to do with them. I finally decided to whip up a quick freezer paper stencil using one of my favorite patterns: argyle. I think little boys look so cute in argyle. This is a more classic pattern that the other shirt I did.


I started by designing my pattern. The two horizontal lines mark the extreme points on the bodysuit where the stencil could go. I decided on the length of each diamond and then marked the mid-point of each. That's where I measured for the width of each diamond. All I had to do next was line up my ruler between the points of each vertical and horizontal line and connect them.


After I painted my diamonds, I used the end of the paintbrush handle to draw my dotted lines. I really like the contrast between the bright yellow, navy blue, and avocado green.


In my haste to start painting I forgot to put some freezer paper inside the shirt in case the paint bled. And sure enough, some of the green pain bled through to the back of the bodysuit. To fix the mistake I also painted my stencil on the back, lining up the green diamonds over the bleed through. I really like the back. I guess sometimes mistakes can lead to a better finished product.


I love how this project turned out. I think my little guy looks so cute in his "new" shirt. I have done several stenciling projects using different methods, but this was my first time using freezer paper. If you haven't tried it yet you have to get some. I loved it. It was super easy to iron my stencil in place and I was able to reuse it on the back. It made for nice crisp lines too. Give it a try and see what you can come up with.

This project can also be seen on the Tea Rose Home Link Party.

Wednesday, June 30, 2010

Argyle tee


Here's another example of taking a plain t-shirt and adding some paint and some stitching to make it more fun. I started by sewing a t-shirt like this blue one using a light gray knit; this was my first shirt so I hadn't realized I needed to lengthen the pattern for my little guy's long torso. I love argyle of any kind so I decided to try some stenciling and some flossing like I have seen all over mommy blog-land recently. I got the idea for the flossing from Cheri over at I am momma, hear me roar

 Once I had the shirt made I decided to tape out an argyle pattern using my trusty blue painter's tape. I wasn't sure how I would make a freezer paper stencil for this pattern and it seemed like a lot of tedious work to cut out a bunch of tiny diamonds. In theory, the tape was a great alternative (you'll see in a minute why this idea might not have been my best). It was really easy to lay out the pattern and I could keep repositioning the tape until I liked the spacing and layout.

After taping off the argyle pattern it was time to paint. I used blue, orange, and lime green fabric paint (Tulip matte soft) so the finished product would be nice and bright. I just painted random diamonds. I didn't want to cover up all the spaces I had taped off and even though argyle is usually a repeated pattern I didn't want mine to be perfect; I like the random quality. I also doodled a little on the tape with a Sharpie to see how some stitching would look.

I decided that I needed to define each of my diamond shapes with some machine stitching so that the unpainted shapes would stand out as well. Here is where my brilliant plan to simplify the stenciling process by using the tape went awry. I decided to use the edges of each strip of tape as a guide while sewing on my outlines. By sewing over tape I ended up with tiny squares that had to be pulled off one at a time. Once again, my desire to finish a project got in the way of double-checking to make sure I wasn't making more work for myself. I'm sure you've heard the adage, "measure twice, cut once." Sadly, it is one I usually forget to remember. On the positive side, I really liked the way my lines came out; the tape did help me sew in nice straight lines.

Here's what it looked like after I'd finished picking off all my tiny squares of tape (some of them with tweezers). I watched a little TV to make the process a little less boring. I was pretty happy with my efforts thus far but I still felt like it needed something more. Enter the flossing.

I used white embroidery thread/floss to add the hand stitching in the middle of each empty line. I think it made the whole argyle pattern look more authentic. I'm so happy to have finally finished another cute shirt for my little guy.

Tuesday, June 29, 2010

Better Birdie Bodysuit


My little guy lives in short-sleeved bodysuits now that it's summer. We have lots of them in cute colors but they're all plain. I have a hard time finding patterns or designs that I like. I don't want to cover my baby in brand logos or characters from television shows. I just want a cute little shirt so I decided to add a stencil to make it unique and more fun.


I started with this little red heathered bodysuit from Wal-mart that was on sale for super cheap; just the way I like clothes he's going to ruin in a single meal.


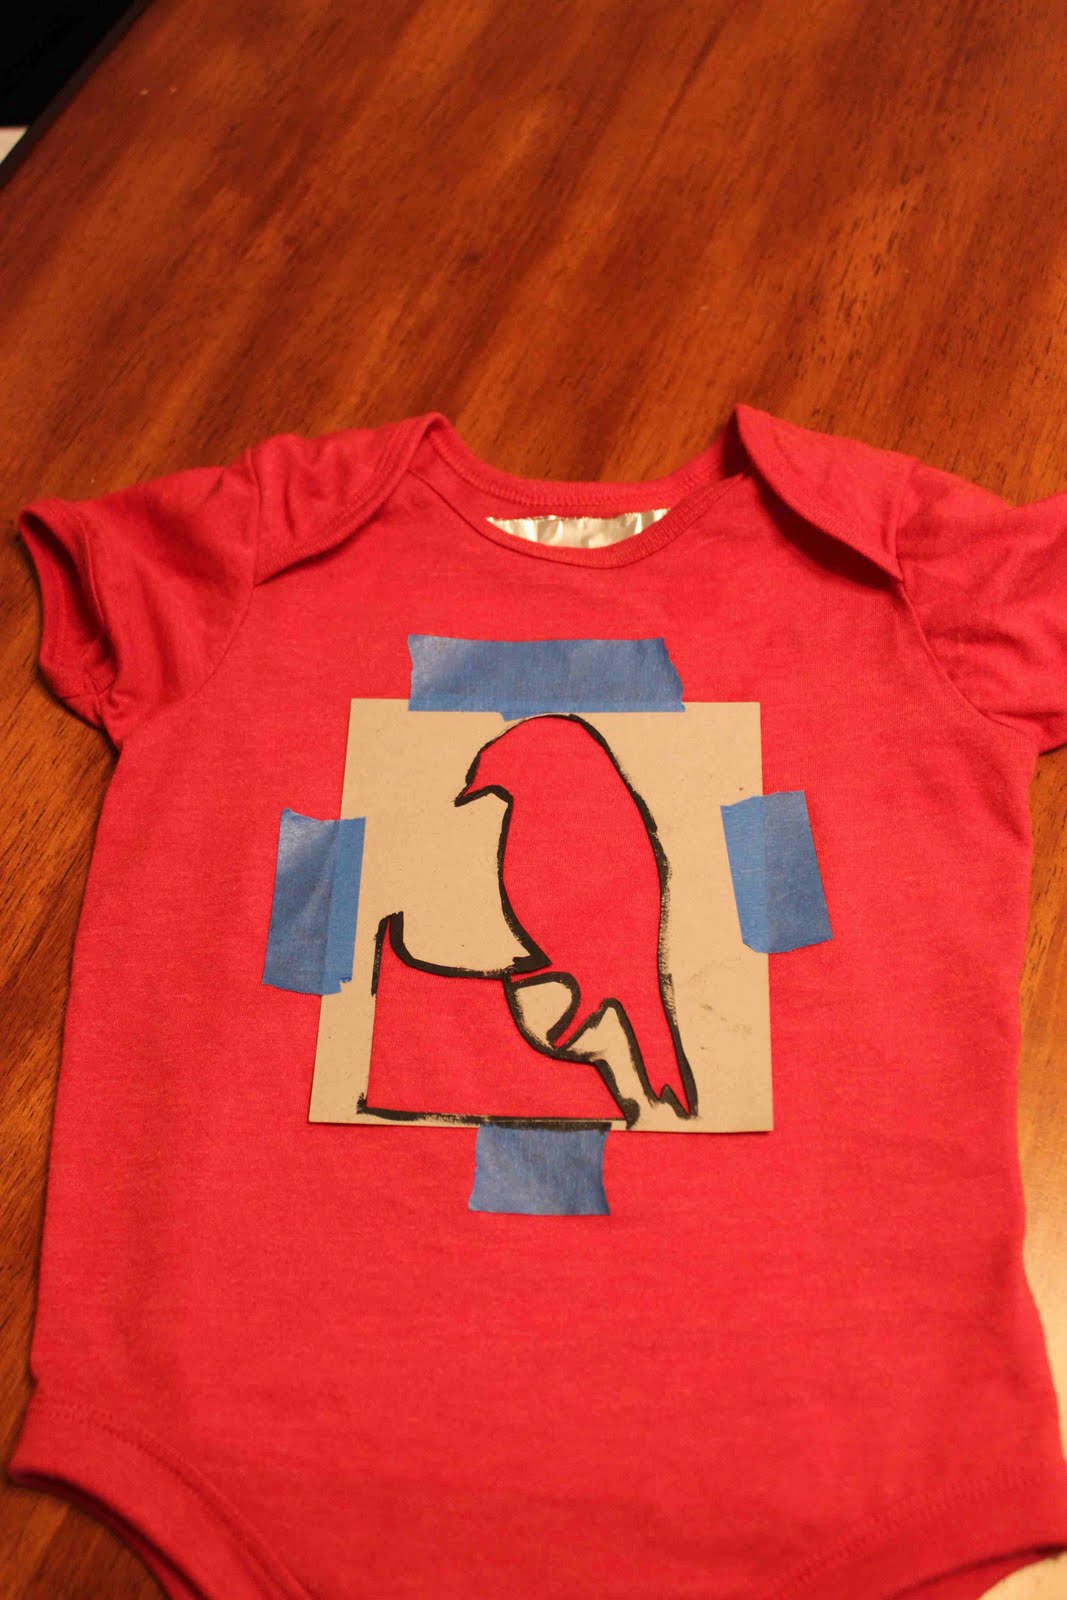
I found a bird silhouette on the web that I liked and then I traced it onto a little piece of thin cardboard. I used one of the little squares that comes inside of a fat quarter of fabric (I knew I'd find something to do with all those little squares). I just taped down the edges with blue painter's tape and put a piece of aluminum foil inside the shirt in case the paint bled through. Why foil? Because it was handy and I hadn't yet bought any freezer paper.


I started by filling in most of the bird with black fabric paint (I used Tulip matte soft fabric paint). I wanted a little of the red to show on the breast of the bird. The black alone felt a little plain so I decided to add a little grayish-blue that I mixed up. You can see some of the blue on the rock the bird's standing on. I removed the stencil once the black paint dried and then free-handed the blue accents around the tail and for the eye.


I'm really happy with how this turned out. The blue really pops on top of the black and helps add a little more dimension to my bird. Now he looks like he has some feathers and I love the wispy tail.


 This project can also be viewed, along with many fabulous others, at the Tea Rose Home link party.