Showing posts with label baby gear. Show all posts

Monday, August 23, 2010

DIY Oilcloth Smock/Bib


I'm pretty sure all babies are messy eaters. I haven't conducted a scientific survey or anything, but I've observed a few babies in my time. My little guy needed a better bib; preferably one that covered as much of his clothing as possible. You wouldn't believe (unless you have your own ravenous self-feeder) how much food we find in his lap after a meal. I decided to make a smock-style bib that covers his entire torso, front and back.


I found this awesome oilcloth on clearance at my local Jo-Ann's Fabric superstore. I bought 1/3 yd. so I had a strip 12" wide. I cut it half and then folded one half in half to create the smock/bib. I used an existing bib as a template for my neck hole. I traced the shape on the wrong side of my fabric before cutting it out.


The hole is too small to fit over a baby's head but you want a snug neck opening so bunches of crumbs don't end up running down your messy baby's chin and onto his shirt. After I cut the neck opening I cut one of the shoulders apart along the fold. I attached heavy-duty snaps on the shoulder because my monster boy can pull apart the Velcro on his other bibs.


I added a pocket on the bottom of the front to catch some of the crumby overflow. The great thing about using oilcloth is that you don't have to hem anything. Just cut and sew.


My little guy likes to lift up his bibs now so I needed a way to keep the sides together. I used ribbon ties on this bib, but he pulled so hard that he ripped the ribbons off. This time I sewed black buttons on the back side about half-way down each side using heavy-duty thread. On the front, I sewed on loops of round elastic cord.

Here's the back view.

My little model. He looks like he's wearing a really mod little shirt.
We tried it out at lunch today. Our new bib worked great. My little guy couldn't pull it off and after lunch the pocket was full of bits that would have been all over his pants. And best of all, when I took the bib off his shirt was clean. Well, mostly. He managed to dribble some tomato seeds down his neck folds onto his shirt so I think I'll line the neckline with some terrycloth to catch the random baby moisture.

Saturday, July 17, 2010

Double-duty: pacificer/toy clip


If you have a baby that uses a pacifier, you probably have a pacifier clip. I wanted a clip that I could also use with toys so I don't have to worry about my little guy dropping something while we're out. I often use the little plastic links to clip a toy to the grocery cart but my little guy can rip those off in a heartbeat now.


I bought this pacifier clip by Munchkin for around $5 at Target. I was desperate; we had just lost a clip and the pacifier attached to it. I don't want to own a mountain of pacifiers so I can't afford to lose one of the three we have. Our original clip had a little plastic clothespin-like attachment that my little guy learned to pull off the day we got it with what I affectionately call his monster paws. He gets those from his father. (What are monster paws, you ask? That's what I call my husband's hands. He doesn't seem to realize how strong he is and he is frequently breaking, bending, or otherwise ruining objects in the most bizarre fashion. Like breaking a glass while holding it, ripping a shoelace in half while tying his shoes, bending a teaspoon while eating cereal. I know, it's weird.) Now don't get me wrong, I'm happy with this clip but it has two drawbacks: 1) it's ridiculously over-priced, and 2) it isn't large enough to hold a toy. I could have added extra Velcro to this one to extend it's size but we needed a second one anyway so I can wash the first when it's good and grubby.


Here are my materials, minus the thread. The suspender clips cost $1 apiece (I got mine at Hobby Lobby), the Velcro is only a few cents for the bit that I used, and the entire spool of ribbon was about $3. The completed clip cost me about $1.50 instead of $5.


I used 12" of ribbon for my clip. I folded each end over 1/4" twice and then pinned it in place before sewing.


I made sure to leave enough room when wrapping the end around the suspender clip so that I could sew it down without the clip getting caught in my machine.


I attached the loop part of my Velcro to the other end of my ribbon. I like this particular Velcro because it has a sticky back that holds it in place while you sew it without the use of pins. After trying the ribbon around some of the toys I might want to attach it too, I added enough of the hook part of the Velcro to make a secure closure.


On the smallest setting, it works for the pacifier.


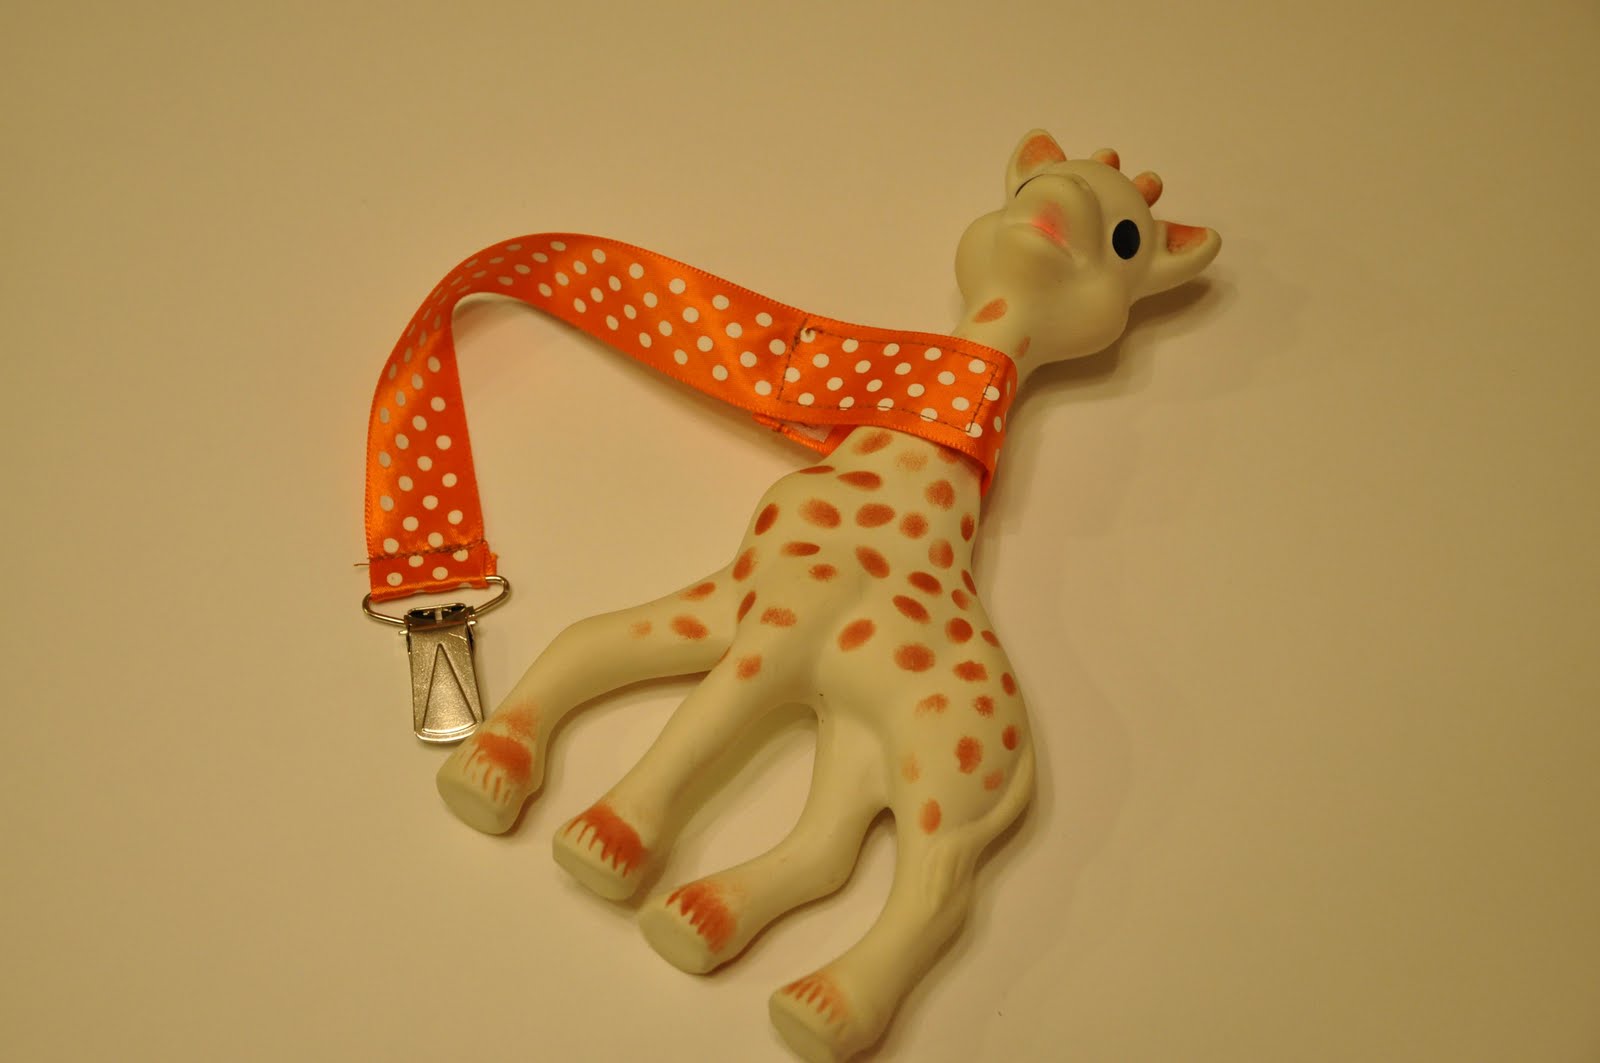
But it can also be attached to a teether.


Or it can be attached to a toy.


It even fits around a big toy. This was a super quick and easy project. The suspender clips stay securely attached to my little guy's clothing and even his monster paws can't pull them off, yet.