Showing posts with label embellishment. Show all posts
Friday, July 23, 2010
Felt flower headband
Have you noticed how many headband tutorials there are out there in blogland? I've seen them everywhere; too many places to note as inspiration for my own. I don't wear a lot of headbands but I thought I'd make a cute neutral one for when the mood strikes me.
I had several of these rubbery sport headbands lying around. I like the stretchy kind, rather than the plastic type, because they don't poke into the backs of my ears and they don't slip around. Especially these grippy guys. I decided to use one of my thinner ones as the base for my felt flower.
I cut out a few circle templates using my handy dandy Martha Stewart circle cutter and then traced them onto my felt with a Sharpie. Then I cut each circle out with my pinking shears. I layered them and glued them together with some washable fabric glue. My flower looked a little unfinished until I added a little teal bead in the center.
This was a fast and easy little project. I'm quite pleased about having something a little nicer looking to wear when I've had enough of my hair in my face on a hot day.
Tuesday, June 29, 2010
Better Birdie Bodysuit
My little guy lives in short-sleeved bodysuits now that it's summer. We have lots of them in cute colors but they're all plain. I have a hard time finding patterns or designs that I like. I don't want to cover my baby in brand logos or characters from television shows. I just want a cute little shirt so I decided to add a stencil to make it unique and more fun.
I started with this little red heathered bodysuit from Wal-mart that was on sale for super cheap; just the way I like clothes he's going to ruin in a single meal.
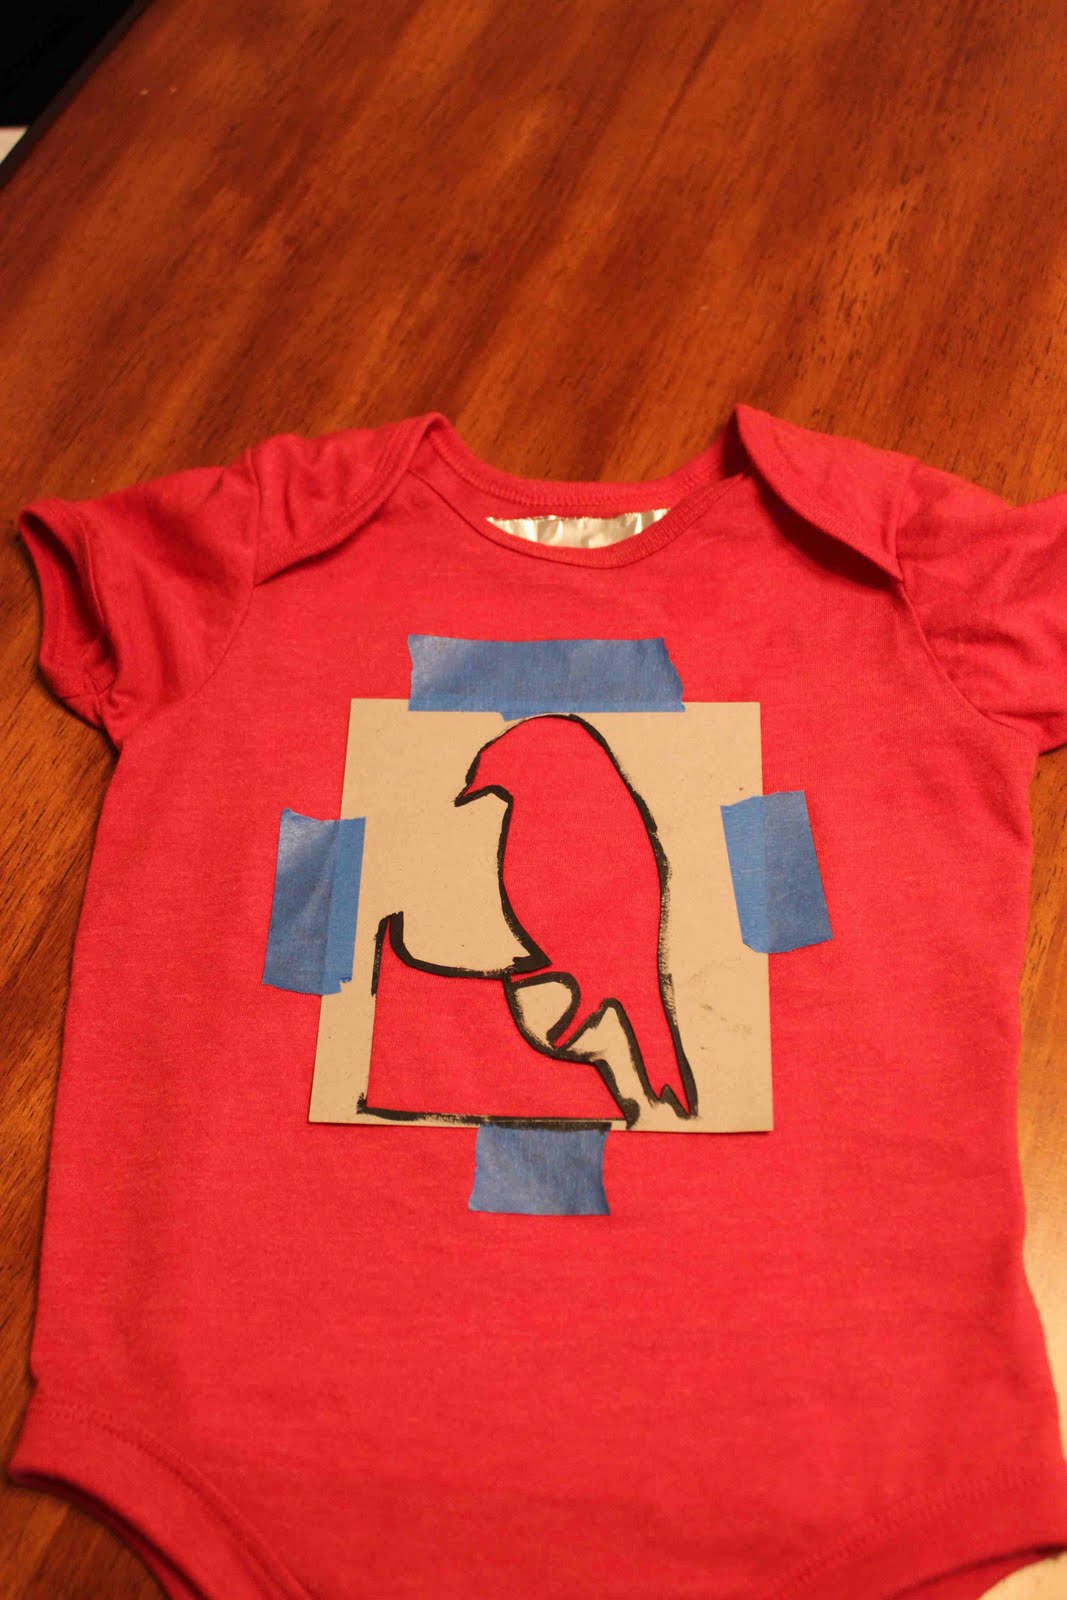
I found a bird silhouette on the web that I liked and then I traced it onto a little piece of thin cardboard. I used one of the little squares that comes inside of a fat quarter of fabric (I knew I'd find something to do with all those little squares). I just taped down the edges with blue painter's tape and put a piece of aluminum foil inside the shirt in case the paint bled through. Why foil? Because it was handy and I hadn't yet bought any freezer paper.
I started by filling in most of the bird with black fabric paint (I used Tulip matte soft fabric paint). I wanted a little of the red to show on the breast of the bird. The black alone felt a little plain so I decided to add a little grayish-blue that I mixed up. You can see some of the blue on the rock the bird's standing on. I removed the stencil once the black paint dried and then free-handed the blue accents around the tail and for the eye.
I'm really happy with how this turned out. The blue really pops on top of the black and helps add a little more dimension to my bird. Now he looks like he has some feathers and I love the wispy tail.

This project can also be viewed, along with many fabulous others, at the Tea Rose Home link party.
Saturday, June 19, 2010
Spruced up cardigan
Here's the finished product. I liked the pale pink sweater that I found for pretty cheap from Old Navy but I felt like it needed a little something extra; enter some felt flower embellishment. (I can see now that I should have taken my sweater out of the dryer before it got all wrinkly. I think it's still pretty cute though.)
A few weeks ago I bought these shoes at Payless and I was inspired by the cute flowers on the toes.
I have seen lots of fun felt flower ideas on multiple blogs recently and thought I would make some of my own. It was super simple too and very quick; just the right project to complete while one little boy took a nap. I looked through the clip-art available in Microsoft Word (I know, what a strange place to look for a template for crafts, but it totally worked for this). Once I found a flower I liked I made several copies (again, in Word) and scaled them so the largest was 3" in diameter. I scaled down the rest of my copies by 1/2" from the previous size.
When I cut out all of my templates I was ready to cut them out of my felt. I liked the contrast of the bluish-lavender colored felt and the pale pink of the sweater. I wanted more of a pop than tone-on-tone flowers offered. I stacked and re-stacked my layers until I was happy with how the flowers looked. When I was satisfied, I glued all the layers together using Fabri-Tac permanent adhesive since it's washable.
Originally I planned to use all six of the sizes to create my flower, but once I stacked them I decided it was too much. For the large flower I ended up using the five biggest flowers and for the smaller flower I used the four smallest sizes. When the glue between the layers was dry I was ready to add the centers. I just used a few glass beads that I had on hand and stitched them on making sure to go through the layers for added support. (I have a small baby around so I don't need to be dropping anything small, glass, and swallow-able onto the floor.) After adding the centers, I was ready to glue the finished flowers to my sweater. I pinned them in place until I liked the placement. I thought the flowers looked better when slightly overlapped. I glued them to the sweater using the same glue as before.
The finished product has been successfully washed and dried and everything is still in place. And now I have a spruced up cardigan to wear since I'm not wearing necklaces anymore due to a strangulation hazard (from the baby strangling me when he tries to rip the necklace off my throat).
Subscribe to:
Posts (Atom)